Showing posts with label christmas countdown. Show all posts

12.24.2013

homes for the holidays | michelle peek photography


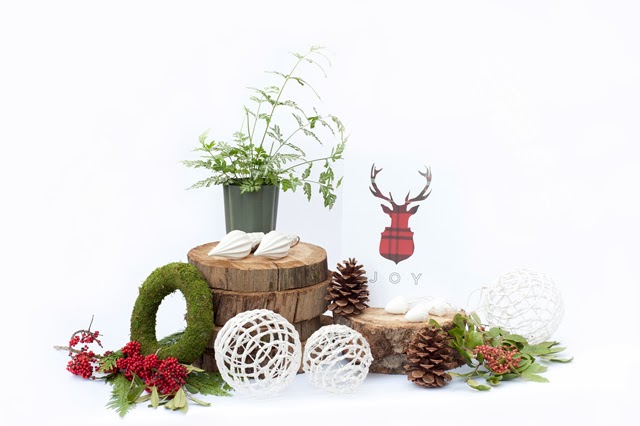
This year I participated in a Charity Home Tour called Homes For The Holidays, with proceeds going to the The Markham Stouffville Hospital Foundation and Varley-McKay Art Foundation of Markham and .

The fundraiser invites designers to decorate a home for Christmas, which people can then come and tour for inspiration to decorate their own homes.

I loved getting in to the festive spirit and filling this home with natural inspired elements. Some of my favourite pieces were the personalized linen calligraphy napkins and large calligraphy poster board that I commissioned the talented Lisa from Post Calligraphy. We also had adorable prints from SS Print shop scattered all over the house.

The tour also gave me a chance to connect with an old friend, now talented photographer Michelle Peek, who came and snapped up some beautiful shots for me. 


12.01.2013

countdown to christmas | 5ive 5ifteen photography


December 1st! Christmas is coming... 24 days to be exact.

And 5ive 5ifteen Photography stopped by this week for a visit and they captured some of our festive wares (thanks for coming and for the donuts gentlemen!)

I LOVE this season. And love when we get to deck the shop out in holiday decor. This year we especially love the mini myrtle topiary, our various cloches, vintage inspired antlers, and the adorable SS PRINT SHOP prints.

Come by and visit us to see some of our other fun holiday decor and gift ideas. But be warned... we may be playing Christmas tunes.

12.20.2012

how to: make a winter wreath


If you've been procrastinating like me this season, you may still have a couple things to do before Christmas: shop, bake, wrap, carol... make a wreath. But it's not too late! You still have 5 days! And this gorgeous, simple olive wreath is so easy you'll be on to rolling out your dough in no time. Read on below for simple instructions...


First, here's what you need:
  • Floral Wire (can be purchased from your local flower shop or nursery)
  • Clippers
  • Olive branches (if you don't fancy olive, this 'how to' can be subsituted with boxwood, cedar, pine, etc.)

Step 1: 
Start by clipping small pieces of olive, ranging from about 6-8" in length. If you cut your pieces first you'll find it easier later on, so you won't have to cut pieces with one hand while trying to hold your wreath with the other.

Step 2 & 3:
You'll see that the individual olive branches (or other green you've chosen) all naturally fall or curve in one direction. Begin to place the pieces together curving in the same direction (almost like a puzzle). Continue by layering more pieces in that same direction until you have a some-what full looking bunch in your hand. 

Step 4:
Start wiring around the bare stems of the branches. Leave an extra 5-6" of wire at the end to tie it off at the end. You will need to pull fairly hard and wrap the wire as tight as you can. 
*TIP Wrapping the wire tightly is especially important if you are using fresh greens, because as the greenery dries it will shrink, so if you've wrapped the wire to loosely the wreath will fall apart.

Step 5 & 6:
Continue to add pieces of olive branch in the same direction, this will eventually create a natural round shape. There's no need to cut the wire as you continue adding pieces, using one long strand will ensure that you can keep the wire and branches tight. Don't worry too much about exposed wire. As you continue to add more stems it will get covered up eventually.

Step 7 & 8:
Keep adding branches until you've reached your desired fullness. When you have come all the way around and your ends meet you simply wire them tightly together. At this point you can cut the wire and for good measure do a couple extra twists around the ends to make it secure.

Step 9:
The wire will now be exposed where you've tied the ends. You can correct this by taking smaller clippings of stems and tucking them in to cover up the wire. You can also do this to the entire wreath, giving it a 'once over' to ensure there are no holes or pieces of wire showing.

Step 10:
The finishing touches! At this point everything is fair game... ribbon, ornaments, whatever your heart desires! Tie your accoutrements over top of where you tied off the ends of the wreath.

And just like that, a simple and elegant handmade wreath... Now get shopping! 

Photos by the amazing Vicky Starz 

12.15.2012

simple & slate holiday tablescape

Another tablescape for you... this one simple, and inspired by these vintage slate ornaments we are selling in the shop this year. 

I love colour. I love using it when I'm designing flower arrangements. I love colour in fashion and interiors. But I have to admit, grey is probably my favourite. There is something so calming about it, so tranquil.

Pulling all the elements for this table was fun. The slate, charcoal and pewter colours all came together perfectly but I wanted to make sure it didn't feel too cold. Adding the moss, Cypress planters and boxwood wreaths added some much needed dimension and life to the table.

My tip for creating a mono-chromatic table with cool colours... try incorporating something organic to keep it from looking dull!

More stunning photos by  Vicky Starz!


12.13.2012

a retro inspired holiday tablescape

There's something so nostalgic about clementines at Christmas. My mom, like her her mom, always tucked them in our stockings when we were kids. I was so excited when I found these satsuma oranges (leaves still on!) at the fruit market near my shop. They were immediately my inspiration for this nostalgic and retro styled tablescape.

I love incorporating fruit in our arrangements at the shop, and these oranges just popped when I nestled them in next to the stunning fuschia peonies, imported from New Zealand at this time of year. 

To play up the retro theme I paired two beautiful mid-century amber and smoke wine glasses I found at the thrift shop, and added some fun vintage glass balls and pine cone ornaments. Soft and natural elements like the real pine cones, birch risers, oatmeal coloured linen napkins and hand painted name tags helped keep the look organic. To pull everything together I laid out the tablescape on a muted sage green velvet runner, which also kept the look elegant and incorporated the other softer natural elements.

To get this look at home try incorporating fruit on your table. Other fruits that remind me of Christmas like pears, pomegranates and persimmons can be found at most grocery stores, and will add that gorgeous bright pop of colour to your table!

Gorgeous photos by the ever-so talented Vicky Starz


11.26.2012

getting winter ready!


Baby it's cold outside! I would say, winter is right around the corner... but in Toronto it feels so much like it's already here. The chilly weather and even a little bit of snow puts me right in the mood for the holidays. So we are getting winter-ready around the shop, making wreaths and garlands, savouring the scent of fresh pine and cedar.  

This past weekend the ever-s0-talented Vicky Starz captured me getting into the spirit of the season with these gorgeous photos.

Less than one month till Christmas!!

12.05.2011

winter peonies


I love peonies! And while they do tend to remind me of the spring, I love that you can get them at this time of year too, imported from South America. They look beautiful in all the seasonal arrangements I'm doing right now, like big fluffy white snowballs. The best looking blooms this fall/winter season are typically available in late November, but they're still available right now. Get in touch to place an order this week.

Red & white ranunculus available from my studio for orders this week too!


12.01.2011

december 1


Goodbye November… and Welcome December! 

It’s perhaps a bit of a contradiction – because I really don't like the winter and hate being cold  BUT Christmas is my absolute favourite time of year! I love everything about it! The music (which I have secretly been playing in my car since mid-November), the decorations, the treats, the wrapping, the Christmas movies, the parties and get-togethers, and the time with family. It really is such a special time of year. 

This Christmas is even more exciting for me. It’s my first holiday season running Sweet Woodruff full-time and I am loving it! All the orders for holiday arrangements and holiday parties have me working away in my studio filled with cedar and pine (smells SO good) and surrounded by buckets of beautiful fluffy white peonies and and deep red amaryllis, bright red holly and ipex berries.  

Yesterday, just in time to welcome December, it snowed and covered the Sweet Woodruff in our garden. Looked so pretty. Let the Christmas countdown begin! 24 days to go...